Understanding Loose or Damaged Roof Tiles
Roof tiles, whether made of clay, concrete, or slate, play a crucial role in protecting homes from the elements. Unfortunately, over time, these tiles can become loose or sustain damage, leading to potential problems for homeowners. This article explores the causes, signs, and preventive measures for loose or damaged roof tiles, as well as steps for addressing these issues.
Causes of Loose or Damaged Roof Tiles
There are several reasons why roof tiles might become loose or damaged. Recognizing these causes can help in taking preventive actions and minimizing repair costs.
Weather Conditions
Extreme weather conditions such as heavy rain, strong winds, hailstorms, and frost can cause tiles to loosen or crack. Prolonged exposure to ultraviolet (UV) rays can also degrade the material over time.
Poor Installation
Improper installation can lead to tiles not being securely fastened, increasing the risk of them becoming dislodged. Incorrect alignment or inadequate overlapping can also accelerate wear and tear.
Old Age
Roof tiles have a finite lifespan. Over time, materials can erode, and fixing mechanisms may weaken, leading to loose or damaged tiles. Regular maintenance can prolong their longevity, but eventually, replacement may be necessary.
Animal Activity
Animals such as birds, squirrels, and raccoons can disturb roof tiles while seeking shelter or foraging for food. Their activities can result in dislodged or cracked tiles.
Tree Damage
Overhanging branches can scrape or fall onto the roof, causing damage to the tiles. Regular trimming of nearby trees can help mitigate this risk.
Signs of Loose or Damaged Roof Tiles
Early detection of loose or damaged roof tiles can prevent more severe damage and costly repairs. Here are some signs to look for:
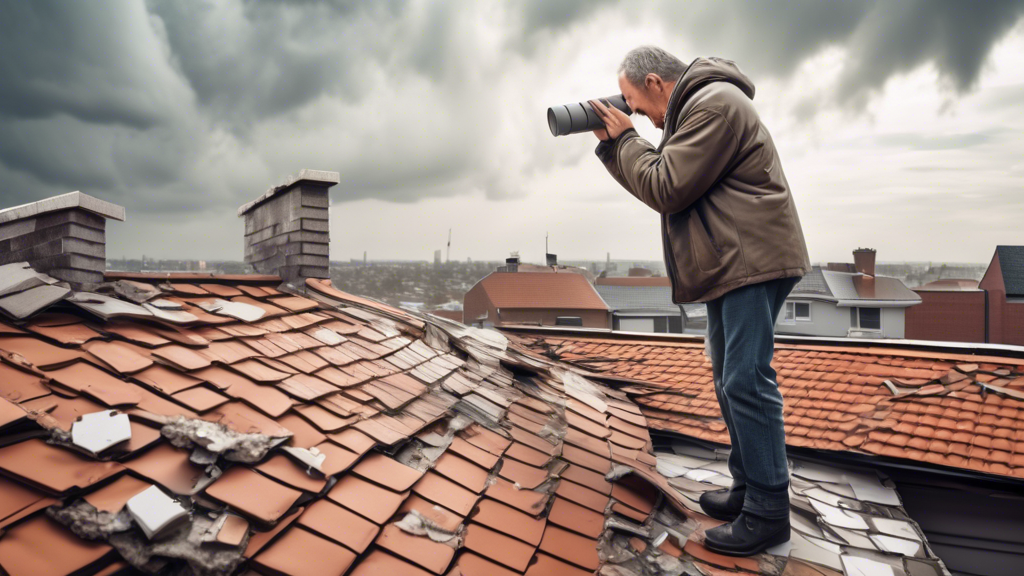
Visible Cracks or Breaks
Cracks and breaks are often visible from the ground or with a pair of binoculars. Damaged tiles will stand out, especially if their color differs from the rest due to exposure to underlying materials.
Missing Tiles
Gaps in the roofline where tiles are missing are a clear indication of dislodgement. Missing tiles leave the roof deck exposed to weather conditions, which can lead to further damage.
Water Leaks
Water stains on ceilings or walls inside the home can indicate a leaky roof. Damaged or loose tiles disrupt the roof’s waterproof barrier, allowing water to seep through.
Dampness or Mold Growth
Persistent dampness or the presence of mold in the attic or upper floors can be a sign of roof tile issues. Mold thrives in moist environments and can spread rapidly, causing health problems and structural damage.
Preventive Measures
Preventing damage to roof tiles is more cost-effective than repairing or replacing them. Homeowners can take several preventive measures to maintain their roof’s integrity:
Regular Inspections
Conducting routine roof inspections, especially after adverse weather conditions, can help identify and address potential issues early. Professional roof inspections are recommended at least once a year.
Proper Installation
Ensuring that roof tiles are installed correctly by experienced professionals can prevent many problems. Proper alignment, secure fastening, and adequate overlap are essential.
Maintenance
Regular maintenance, including cleaning gutters, removing debris, and trimming overhanging branches, can prolong the life of roof tiles and prevent damage.
Repairing Loose or Damaged Roof Tiles
When dealing with loose or damaged roof tiles, timely repair is crucial to prevent further damage. Here are the steps involved in repairing roof tiles:
Assess the Damage
Evaluate the extent of the damage. For minor issues, such as a few loose or chipped tiles, DIY repairs might be possible. For significant damage, professional assistance is recommended.
Gather Tools and Materials
Essential tools include a ladder, safety harness, gloves, pry bar, hammer, replacement tiles, and roofing cement. Safety is paramount, so ensure all equipment is in good condition and used properly.
Remove Damaged Tiles
Carefully remove the damaged tiles using a pry bar, taking care not to damage surrounding tiles. Clean the area to ensure a proper fit for the replacement tile.
Install Replacement Tiles
Position the new tile and secure it with roofing nails or adhesive as appropriate. Ensure it aligns with the surrounding tiles and sits flush to maintain the roof’s waterproof barrier.
Seal and Inspect
Apply roofing cement to seal the edges and prevent water penetration. Inspect the repair to ensure it is secure and watertight.
Conclusion
Loose or damaged roof tiles can lead to significant problems if not addressed promptly. Understanding the causes, recognizing the signs, and taking preventive measures can help maintain the integrity of the roof. Regular inspections, proper installation, and timely repairs are essential for protecting your home from the elements and ensuring the longevity of your roof.